Comet 12P/Pons-Brooks has been a popular astrophotography target for the past few weeks. It’s currently sitting in between and below M31 and M33 – The Andromeda and Triangulum galaxies. Those lucky enough to have clear skies during this time will have the opportunity to capture rare and stunning images.
I made the gif using ezgif.com and my auto-stretched individual exposures converted to .jpgs
This is first comet I’ve tried to capture images of, seeing as how I’ve been doing astrophotography for only a year, but the process of imaging and processing it has been very exciting!
The first step in finding a night sky target for me is always to go on the Stellarium mobile app. I have the paid version, which allows you to add field of view boxes, so that you can simulate what your astro-rig will be able to see that night. So I searched in Stellarium for the comet and planned out my night.
I’ve heard of this “devil comet”, the one with horns – I didn’t think I’d be taking pictures of it myself. The horns appeared a few months ago, a sort of “U” shape appearing as the comet’s tail. That has since turned into a more traditional comet with a beautiful green hue.
The first time around processing the image I actually just stacked it like normal using Pixinsight’s Weighted Batch Pre-Processing script. What happened was the stars were aligned and looked great, but the comet was sort-of drifting in the image, and looked very blurry and had some artifacts, etc.
In short, what you have to do is stack your calibrated images like a normal astrophotography image (calibration here is important because hot pixels can completely ruin the image – at least take some dark frames).
Next, extract the stars from the stacked image using either StarXterminator or Starnet++, or whichever star extraction method you’re most comfortable with. Save this file as a .tif. (put this file somewhere convenient for you)
Then, if you’re using Pixinsight, use a process called CometAlignment. In this process, you will need to add all of your REGISTERED images you used during stacking. Don’t just take them off your SD card or out of your ASIAir, they need to be the registered images. Choose a sensible output directory (name it comet-aligned for simplicity)
Once you’ve added the images to CometAlignment, double click on the first comet image file, and just click in the center of the head of the comet. Do this again for the last comet image. Here we are just letting the program know how the comet has moved from the first to the last image.
Next, still in the CometAlignment process, under the “Subtract” tab – add the stars image that we saved before in the “operand image” field. Then select “stars aligned” in the operand type field.
Now you can click the circle icon to apply this process, and the “comet aligned” images will appear in your specified output directory.
The next process we need to use is called ImageIntegration. Here will will basically stack our comet aligned images.
So go ahead and add the comet aligned files. You can just click the circle and run this process, and you may end up with a great result. My issue was that when I did this, is I ended up with nasty hot pixel trails. I thought my calibration went great and had gotten rid of all the hot pixels in my image, but apparently there were some stragglers.
I was able to mitigate this a bit by selecting “Sigma Clipping” in the Pixel Rejection (1) tab. Default settings here seemed to mostly do the trick.
What I would do from here, if you’re happy with your result, is just go on and process the image like a normal astro pic.
I’m lucky enough to have all the easy mode features of Pixinsight. They are expensive, but it makes processing a breeze and you end up with great images.
For the comet, I would simply run BlurXterminator and NoiseXterminator, add some saturation and then combine the stars and starless images. Then add a slight S curve to the histogram to improve contrast
If you want to, you can get rid of the green noise (SCNR) in the image, while preserving the green hue of the comet by extracting the Luminance channel from the comet aligned image, then make a mask that protects the comet, then run the SCNR process. Proceed to process as normal after that.
So I’m happy with my image of the comet, although it certainly could have been better. We don’t have much time to capture this target per night because it’s so low on the western horizon. But if you can, try to make it out to a dark sky location and get as much time on target as you can.
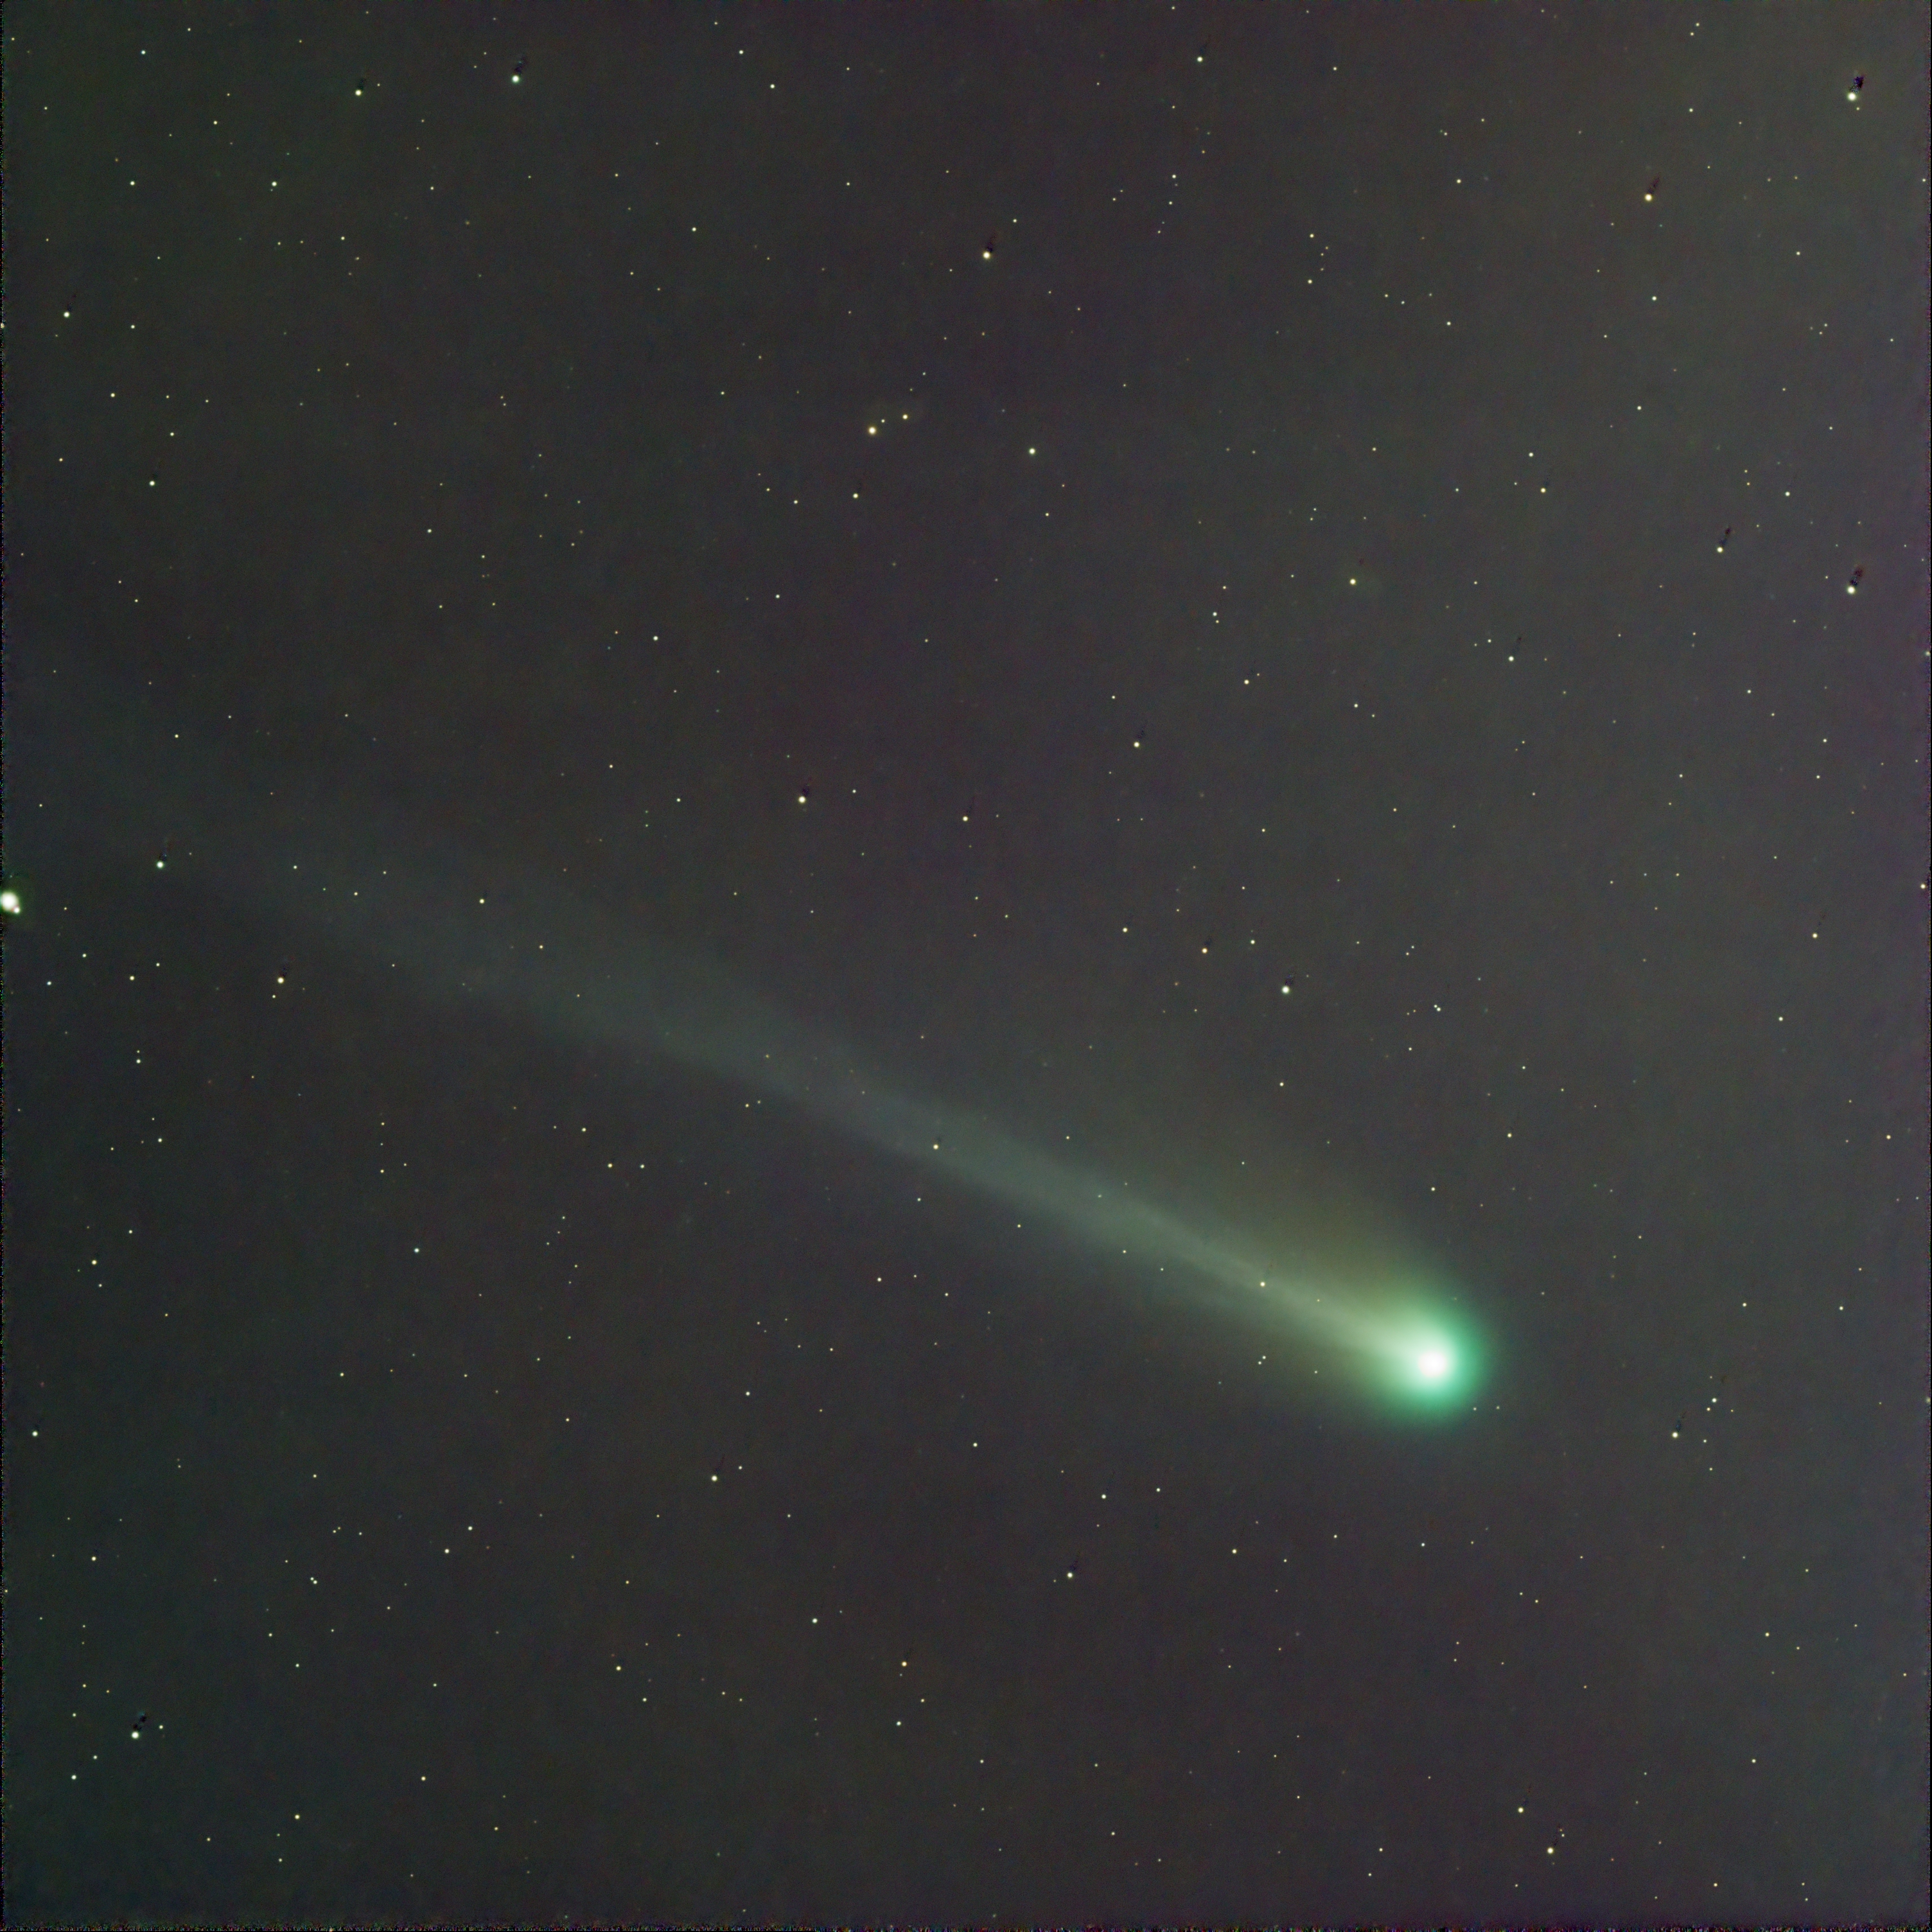
This is 50 images at 30 seconds per exposure. I’d say 30 seconds to a minute is enough to get a good image of the comet. I shot this with my current astro-rig, which you can see on the gear page. In order to capture the galaxies with the comet in the same image, try a 135mm or 50mm lens. (50mm can get you both galaxies plus the comet).
Lastly, this comet will be a couple weeks before Perihelion (closest point to the sun) during the 2024 Total Solar Eclipse. If you’re in the path of totality, you may be able to see this comet with the naked eye when the sun is completely covered by the moon.
Clear Skies!!!