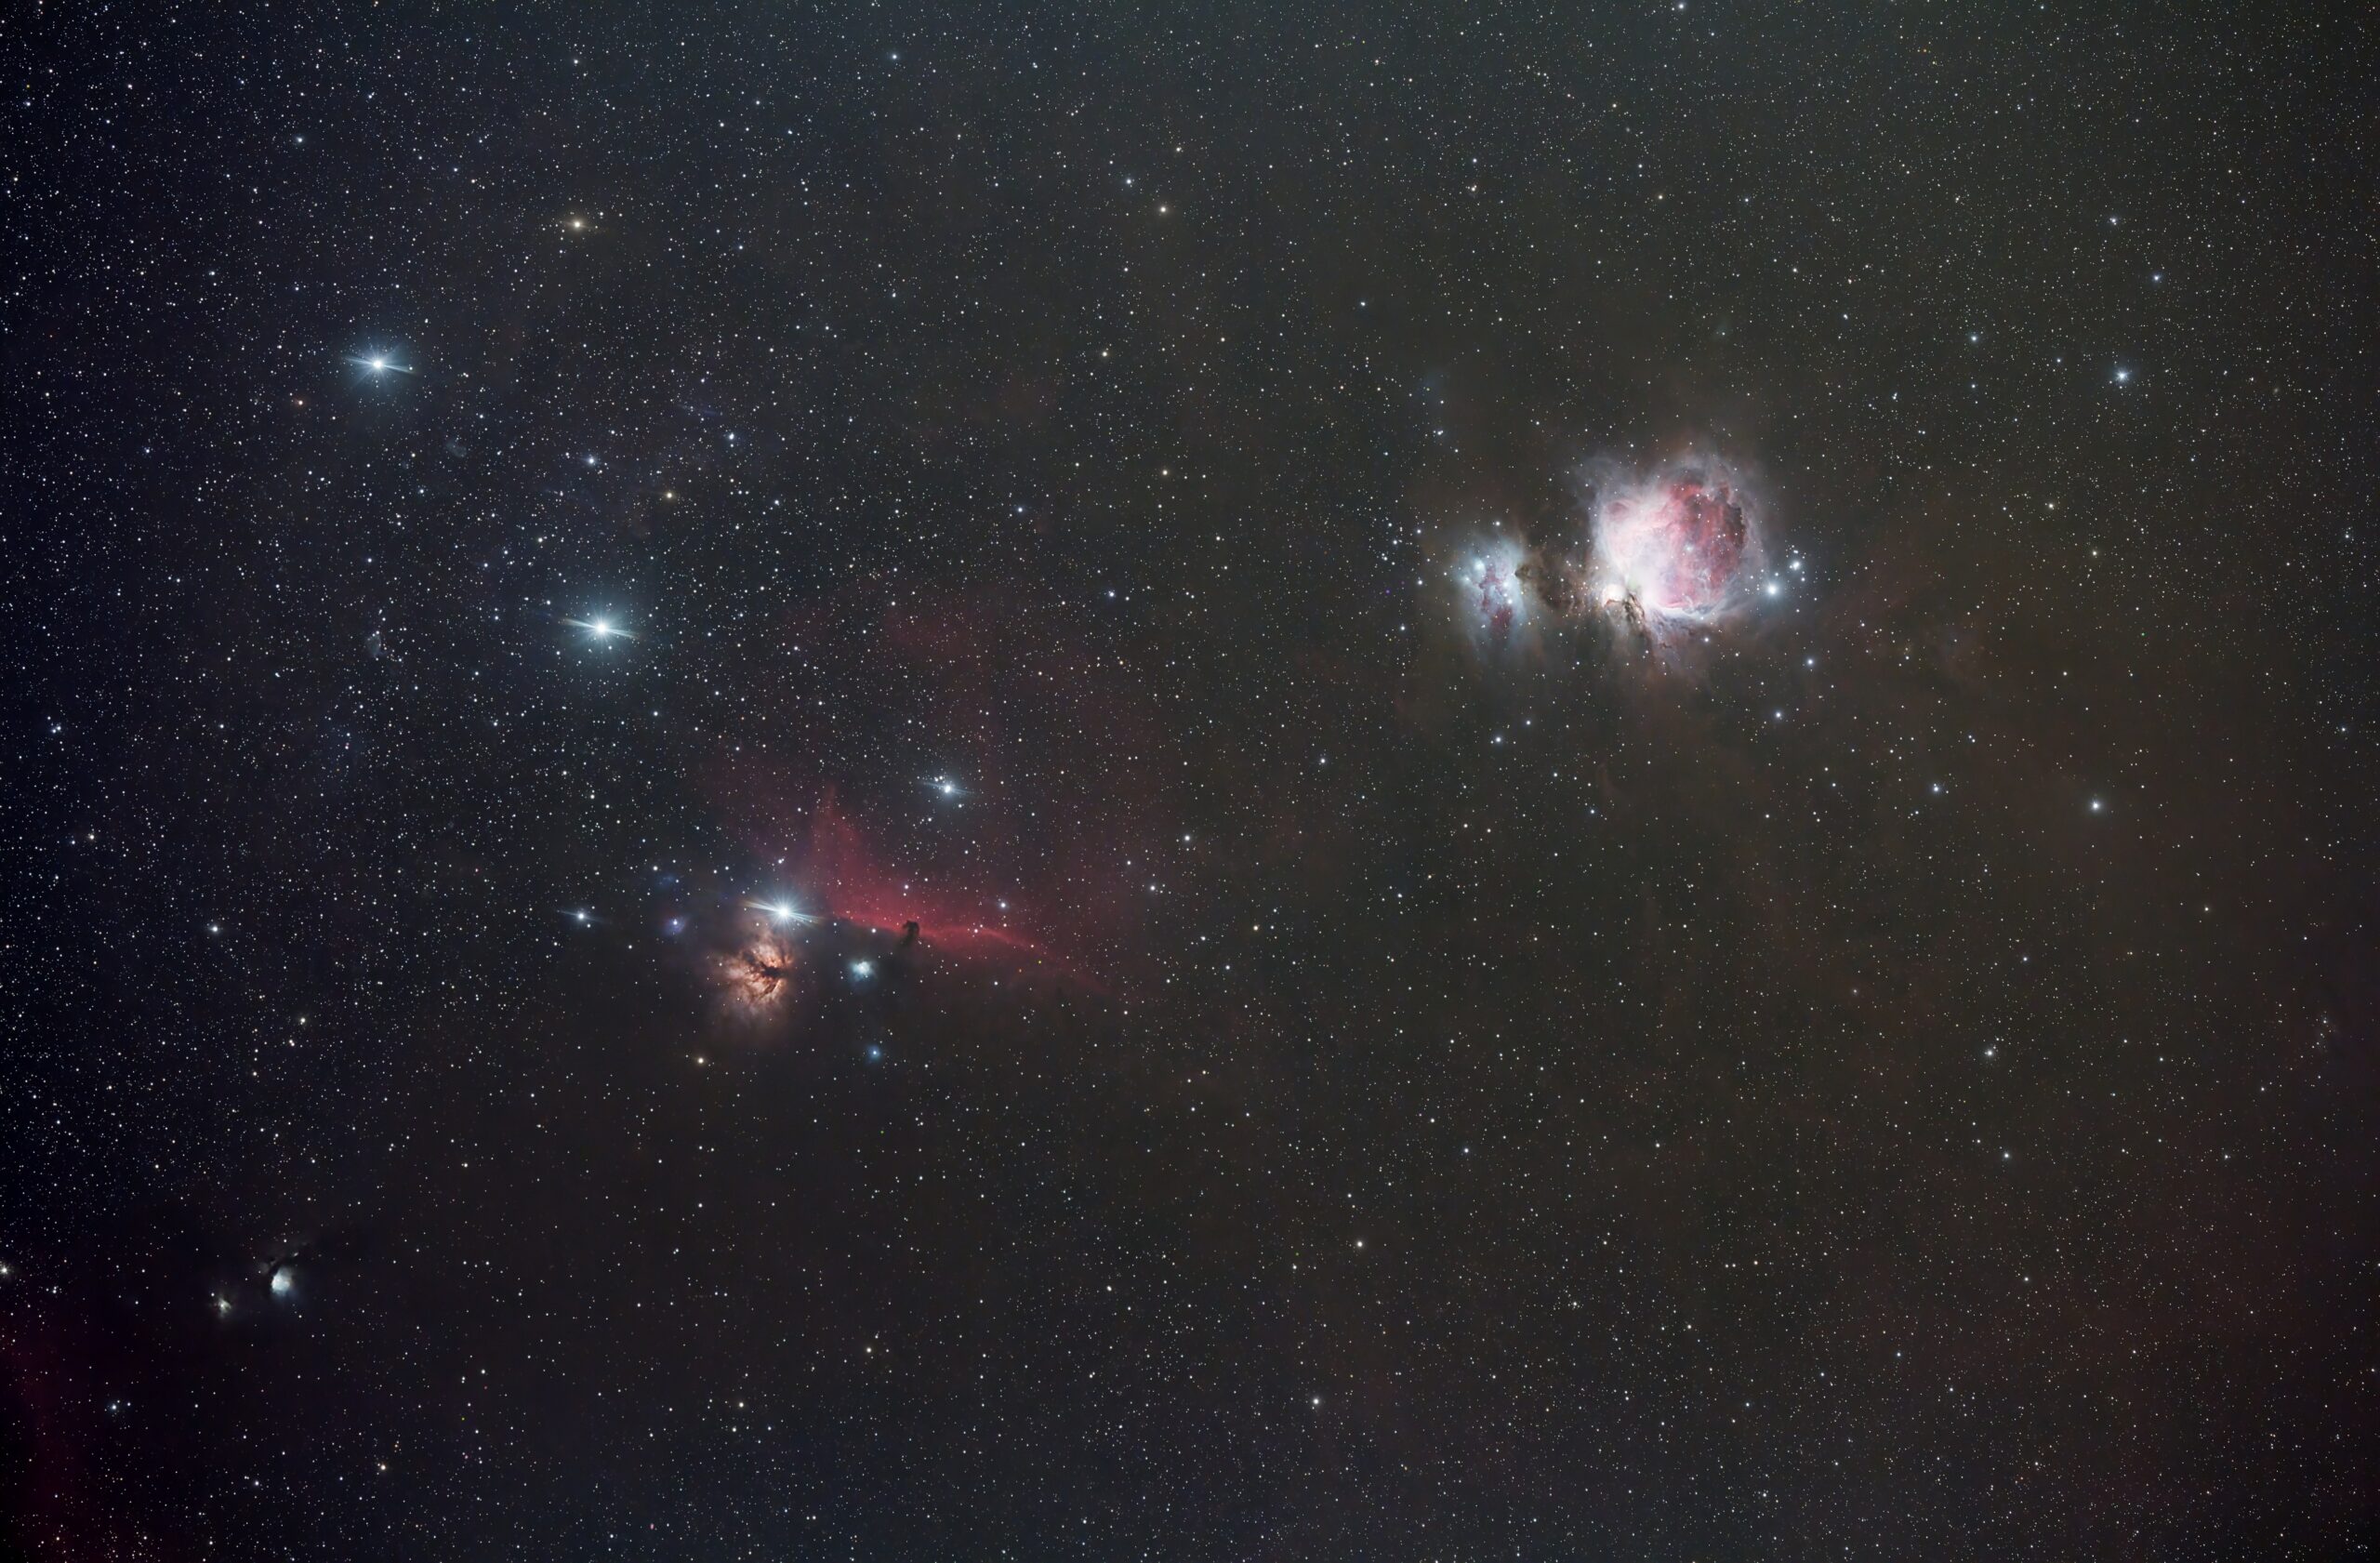
Orion is one of the most exciting constellations to photograph in the night sky. It’s not just the Orion nebula. You also have the Horsehead Nebula on Orion’s belt, in addition to all the other surrounding dust and hydrogen-alpha regions.
That night, comet 12P/Pons-Brooks was smack-dab in between the Andromeda and Triangulum galaxies and I intended to get the best image possible for my first comet. So I decided to head down to Assateague National Seashore in Maryland with some friends for a mini star party. For those of you that don’t know, it’s about a Bortle class 3 (dark enough to see the Milky Way with the naked eye). Check out this light pollution map for reference.
Unfortunately, by the time I had all the gear set up, the clouds rolled in on the western horizon. So although the comet was a no-go, I was determined to go home with a decent picture. I looked around at the sky and spent a bit of time deciding which target to go for. I went with Orion because my friend brought his rig as well, which is equipped with a modified DSLR (canon 60d) and a Rokinon 135mm for extra wide field views.
So with the rokinon 135mm and my Apertura 75Q with a focal length of 405mm (see the gear page), a cooled camera, auto focuser, and guiding, the images were bound to be show-stoppers.
I have almost a year of experience under my belt and have been lucky to be able to spend lots of free time and money to prepare for an opportunity like this. I’ve set up the 135mm rig a number of times (it was originally mine), and I run the Apertura 75Q rig on almost every clear night.
Of course, I brought the dobsonian along, so I set that up as well for everyone to check out amazing views of the waxing crescent moon and Jupiter.
After all was said and done, it took about an hour to set everything up (including a bit of instruction on polar alignment and imaging sequencing for my friend on his rig)
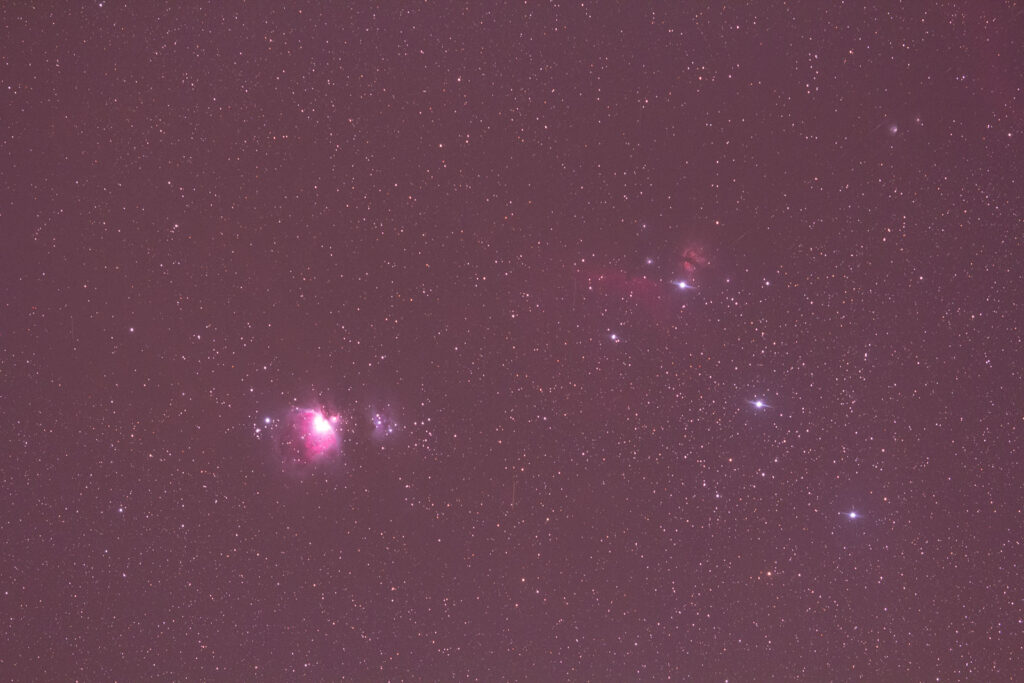
Once set up, we took a few test images – around 30 second exposures just to get our bearings straight, and our targets framed up. With the Rokinon 135mm on the star tracker, after a rough polar alignment we decided on 1 minute subs. Surprisingly, we didn’t even need to hone in on polaris, our very rough polar alignment worked just fine to mitigate star trailing in the 135mm field of view.
The sub exposures were pretty impressive to say the least (see below), so we knew we were going to end up with something nice.
It’s always an awesome night down at Assateague. Even though the clouds rolled in on most of the sky, we were still able to get enough subs to get a nice final result. We were imaging for over an hour, and the clouds had draped over our targets half of that time. The next day, I carefully hand-picked the images from each rig to weed out the ones with too much cloud cover.
See the final stacked image below from the 135mm right, including only 31 sub-frames stacked in Siril and processed in Pixinsight!
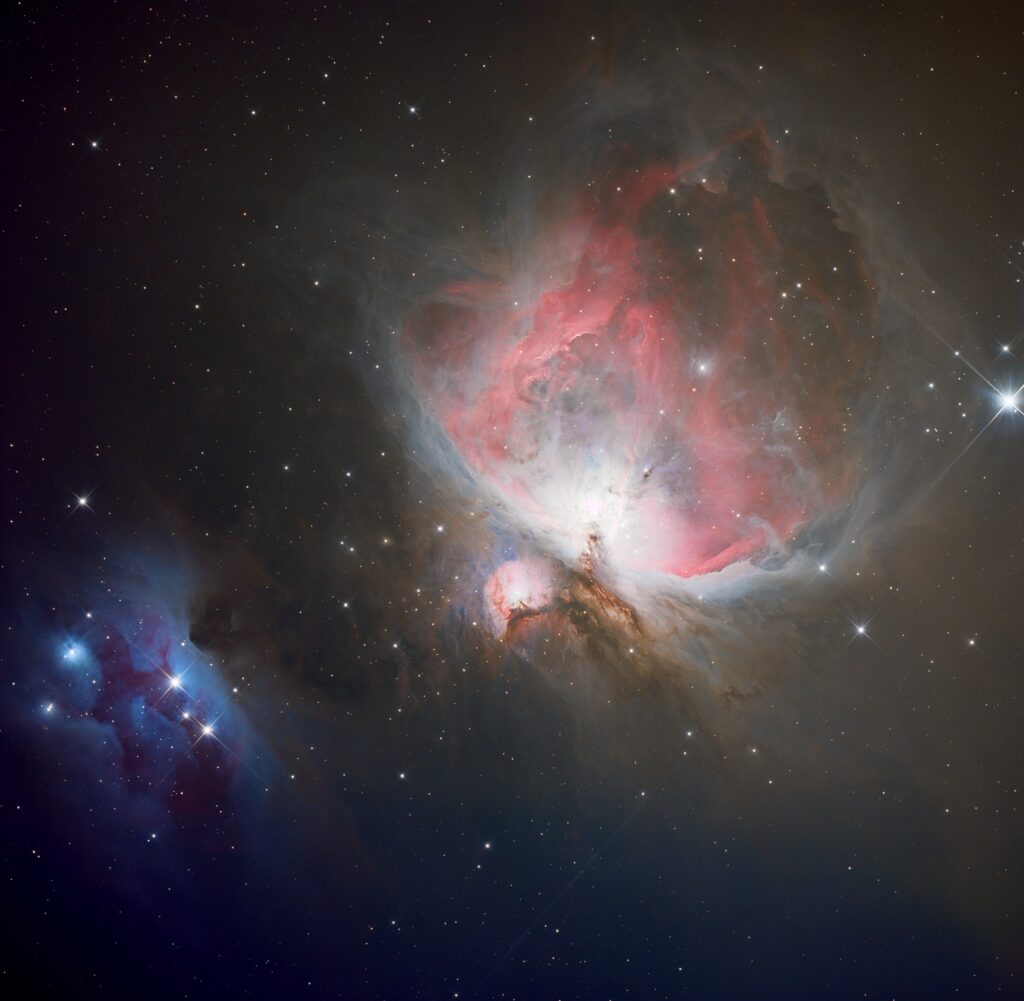
Moving on to the Apertura 75Q.
I decided on 4 minute sub-exposures, which may have been too long because I had to throw out a larger percentage of my subs due to clouds and occasional lights shining in.
For the image below I ended up with 18 good frames I could use, for a total of 72 minutes of total exposure time.

So overall it was a great night, regardless of the clouds and lights. I definitely need to plan more trips to Assateague. Maybe I’ll organize an annual star party there some time in the near future!
To another image comparison into the mix, here is an image of the Orion Nebula I took with my normal astro rig, minus the Apertura 75Q – instead using the Skywatcher Quattro 150p Newtonian Astrograph with a focal length of 600mm (518 with the coma corrector/reducer)